

In this chapter, we are able to learn how to visualize records that's saved in DocumentDB. Microsoft provided Power BI Desktop device which transforms your facts into rich visuals. It also permits you to retrieve statistics from various data assets, merge and rework the facts, create effective reviews and visualizations, and publish the reviews to Power BI.
In the cutting-edge model of Power BI Desktop, Microsoft has introduced guide for DocumentDB as properly in which you can now connect with your DocumentDB account. You can download this tool from the hyperlink, https://powerbi.Microsoft.Com
Let’s take a look at an example wherein we are able to visualize the earthquakes facts imported within the closing chapter.
Step 1 − Once the tool is downloaded, release the Power BI computing device.

Step 2 − Click ‘Get Data’ alternative that's on the Home tab below External Data institution and it'll display the Get Data web page.
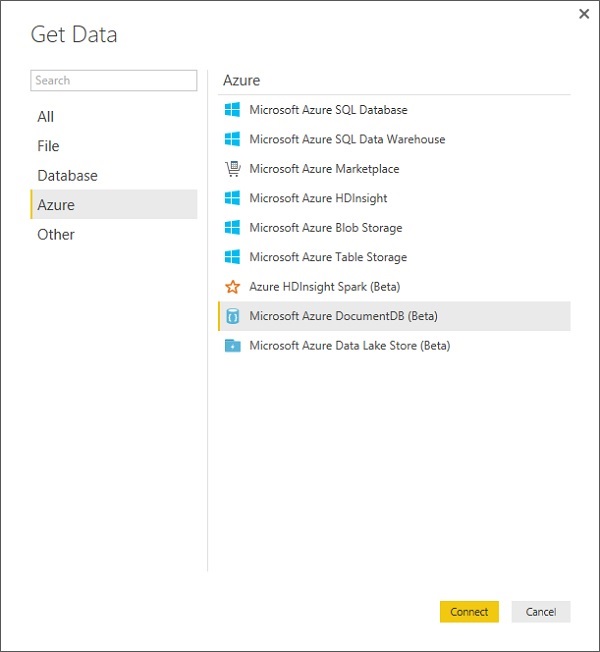
Step 3 − Select the Microsoft Azure DocumentDB (Beta) option and click ‘Connect’ button.
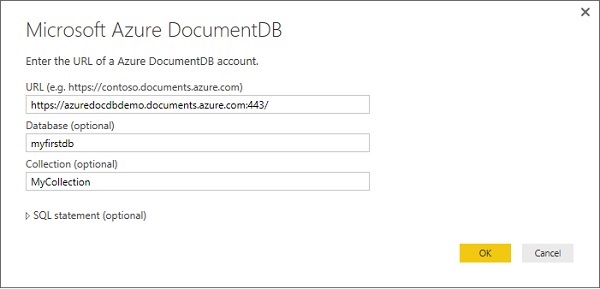
Step 4 − Enter the URL of your Azure DocumentDB account, Database and Collection from which you need visualize facts and press Ok.
If you're connecting to this endpoint for the first time, you may be precipitated for the account key.
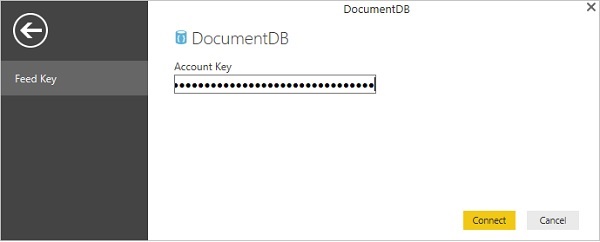
Step 5− Enter the account key (number one key) that's particular for every DocumentDB account available on Azure portal, after which click on Connect.
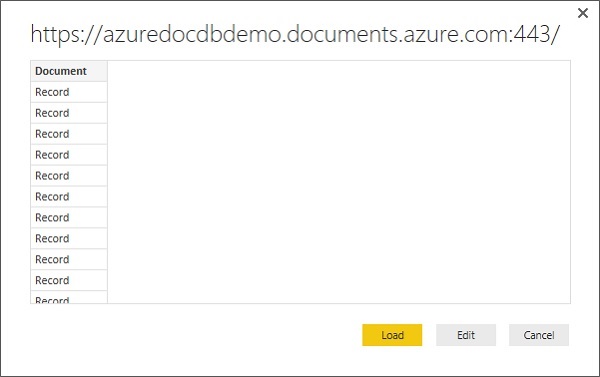
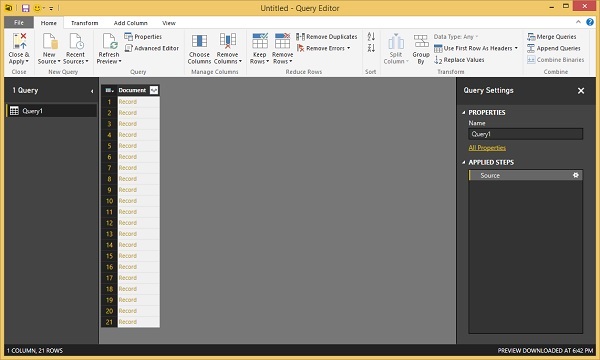
When the account is effectively connected, it'll retrieve the facts from exact database. The Preview pane suggests a listing of Record objects, a Document is represented as a Record type in Power BI.
Step 6 − Click ‘Edit’ button in an effort to release the Query Editor.
Step 7 − In the Power BI Query Editor, you need to see a Document column within the middle pane, click on on the expander on the proper aspect of the Document column header and pick the columns that you need display.
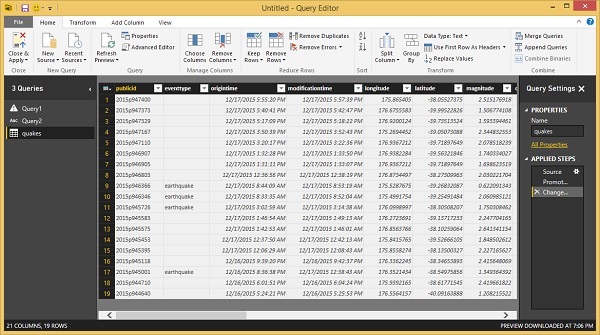
As you could see that we've got latitude and longitude as separate column however we visualize records in latitude, longitude coordinates form.
Step 8 − To do this, click ‘Add Column’ tab.
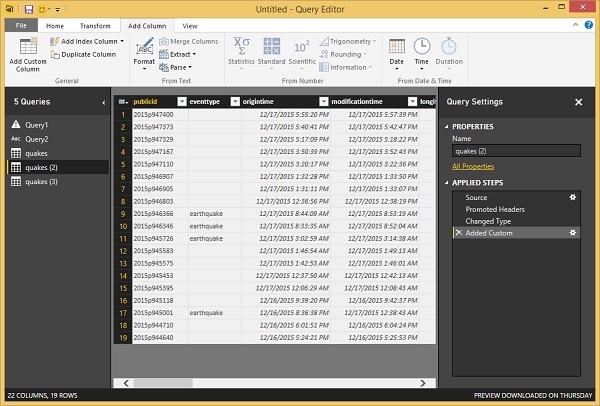
Step 9− Select the Add Custom Column on the way to show the subsequent web page.
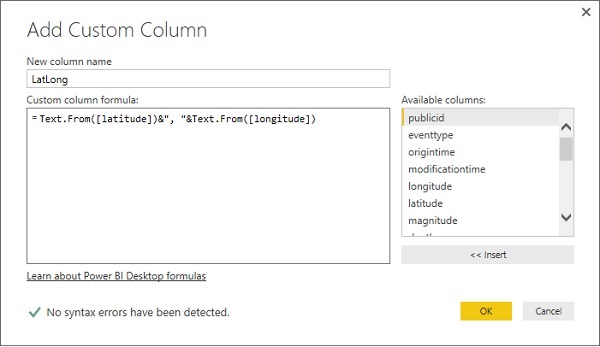
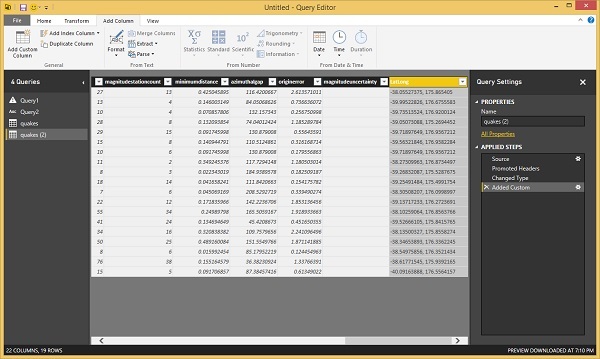
Step 10 − Specify the new column call, let’s say LatLong and also the components so one can combine the range and longitude in a single column separated by using a comma. Following is the method.
Text.From([latitude])&", "&Text.From([longitude])
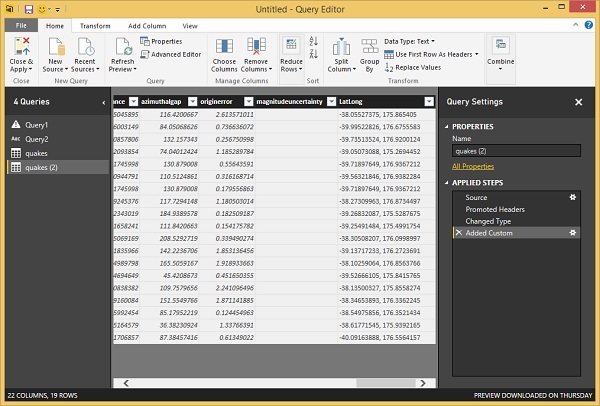
Step 11 − Click OK to retain and you'll see that the brand new column is added.
Step 12 − Go to the Home tab and click ‘Close & Apply’ option.
Step 13 − You can create reports via dragging and dropping fields into the Report canvas. You can see on the right, there are two panes − one Visualizations pane and the other is Fields pane.
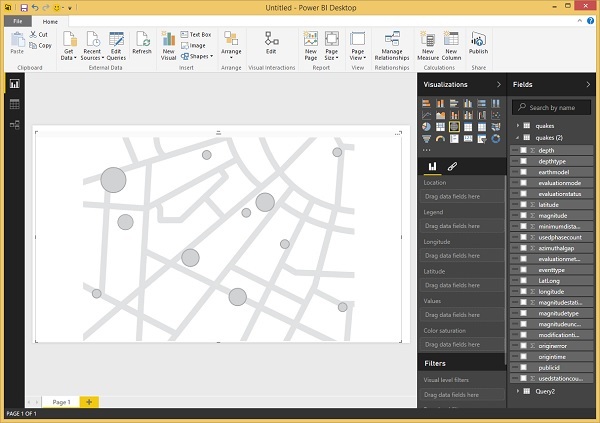
Let’s create a map view displaying the vicinity of each earthquake.
Step 14 − Drag the map visible kind from the Visualizations pane.
Step 15 − Now, drag and drop the LatLong discipline from the Fields pane to the Location property in Visualizations pane. Then, drag and drop the value subject to the Values belongings.
Step 16 − Drag and drop the depth field to the Color saturation belongings.
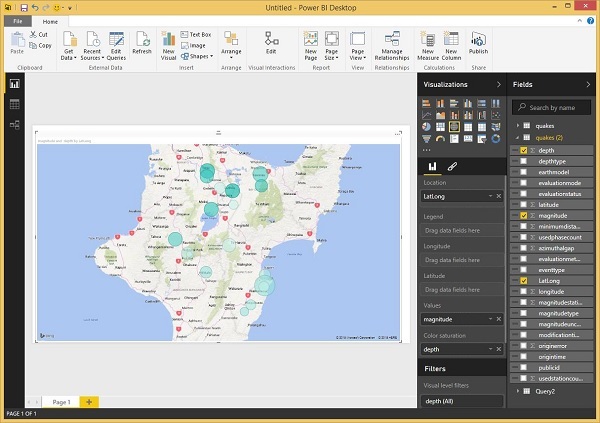
You will now see the Map visible showing a set of bubbles indicating the area of every earthquake.


