To use Microsoft Azure DocumentDB, you must create a DocumentDB account. In this bankruptcy, we are able to create a DocumentDB account using Azure portal.
Step 1 − Log in to the web https://portal.Azure.Com in case you have already got an Azure subscription otherwise you need to sign up first.
You will see the principle Dashboard. It is absolutely customizable so you can arrange these tiles any way you like, resize them, upload and get rid of tiles for things you frequently use or not do.
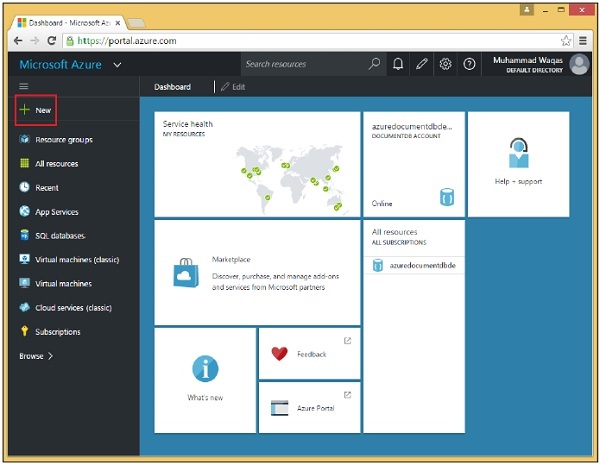
Step 2 − Select the ‘New’ alternative at the top left facet of the web page.
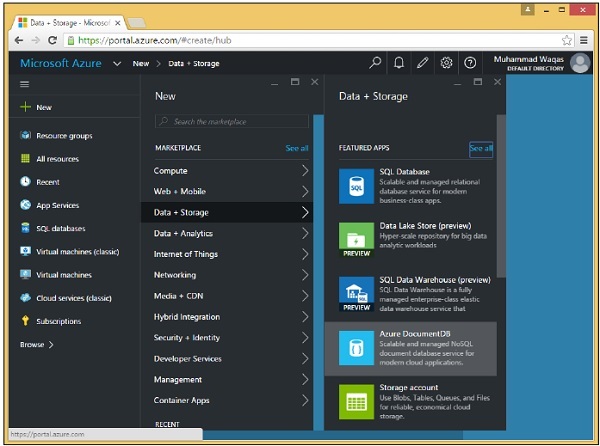
Step 3− Now choose Data + Storage > Azure DocumentDB alternative and also you see the following New DocumentDB account phase.
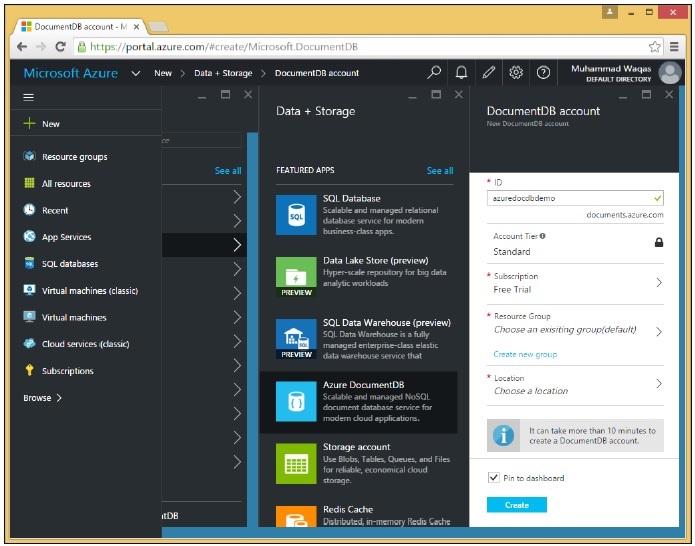
We need to give you a globally precise call (ID), which mixed with .Files.Azure.Com is the publicly addressable endpoint to our DocumentDB account. All the databases we create underneath that account can be accessed over the net using this endpoint.
Step 4− Let’s name it azuredocdbdemo and click on on Resource Group → new_resource.
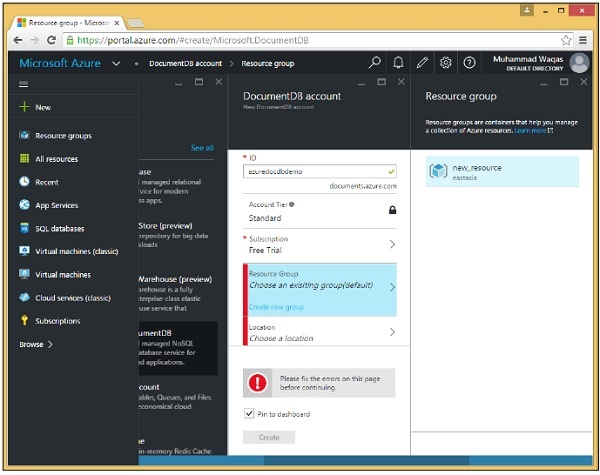
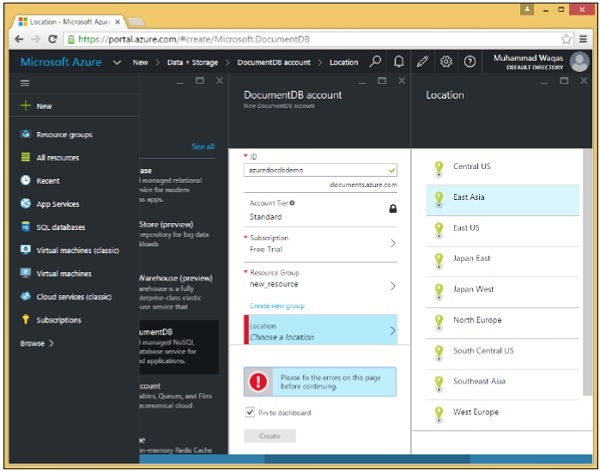
Step 5 − Choose the place i.E., which Microsoft records center you want this account to be hosted. Select the area and choose your area.
Step 6 − Check Pin to dashboard checkbox and simply move in advance and click on Create button.
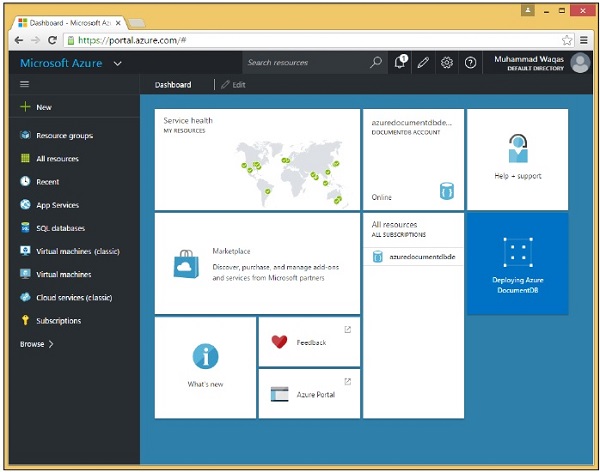
You can see that the tile has already been brought to the Dashboard, and it's letting us recognize that the account is being created. It can really take a few minutes to set matters up for a new account whilst DocumentDB allocates the endpoint, provisions replicas, and plays other work inside the history.
Once it is finished, you may see the dashboard.

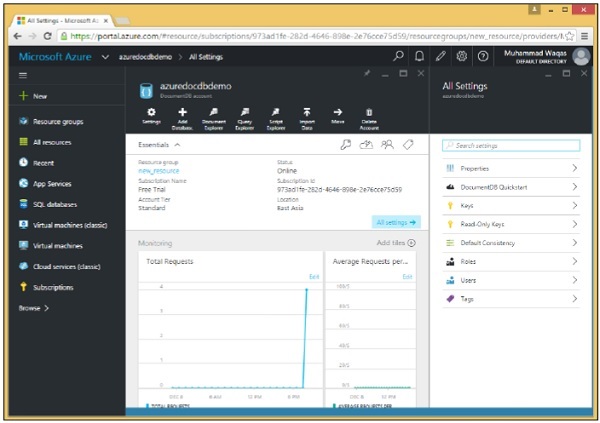
Step 7 − Now click on the created DocumentDB account and you will see an in depth screen as the subsequent picture.