In order to increase Selenium RC or WebDriver scripts, users have to make sure that they have got the preliminary configuration completed. Setting up the surroundings entails the subsequent steps.
- Download and Install Java
- Download and Configure Eclipse
- Configure FireBug and FirePath
- Configure Selenium RC
- Configure Selenium WebDriver
Download and Install Java
We need to have JDK (Java Development Kit) mounted so that you can paintings with Selenium WebDriver/Selenium. Let us see how to download and deploy Java.
Step 1 − Navigate to the UR.
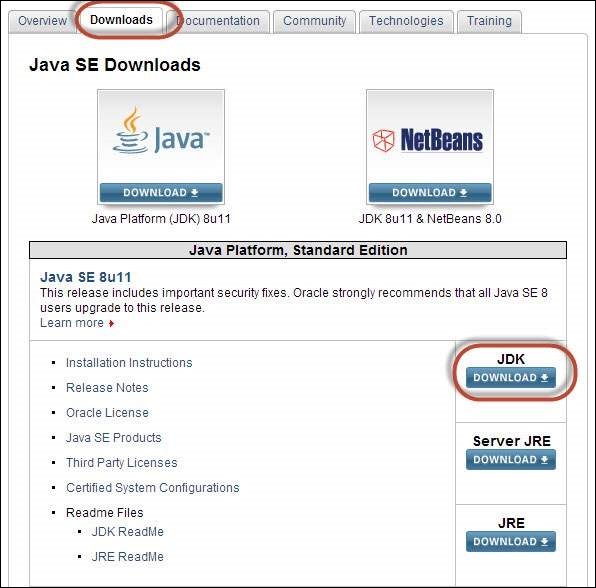
Https://www.Oracle.Com/technetwork/java/javase/downloads/index.Html
Step 2 − Go to "Downloads" section and select "JDK Download".
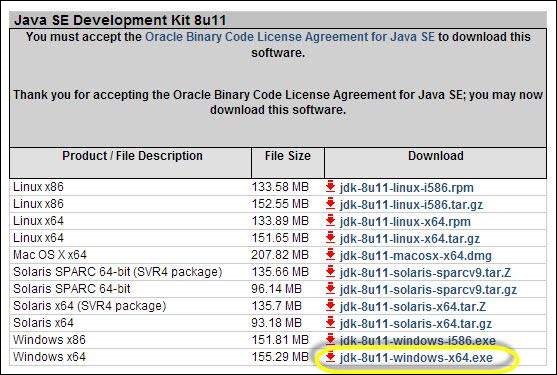
Step 3− Select "Accept License Agreement" radio button.

Step 4− Select the best set up. In this example, it's far 'Windows 7-sixty four' bit. Click an appropriate link and keep the .Exe document in your disk.
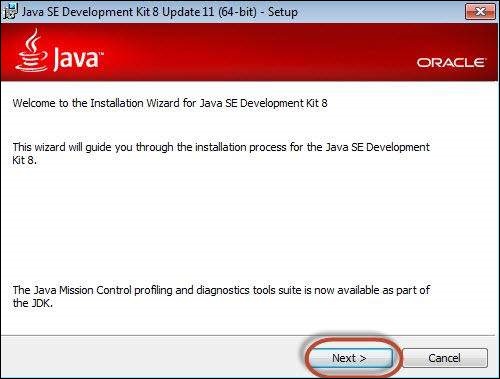
Step 5− Run the downloaded exe report to launch the Installer wizard. Click 'Next' to keep.
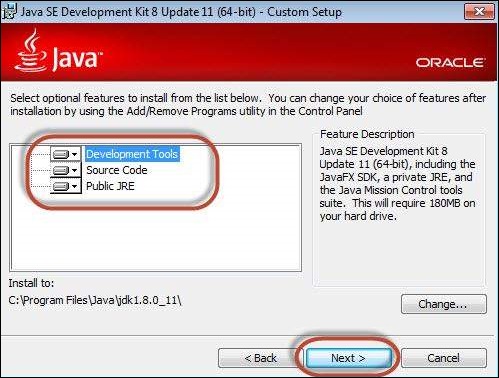
Step 6 − Select the features and click 'Next'.
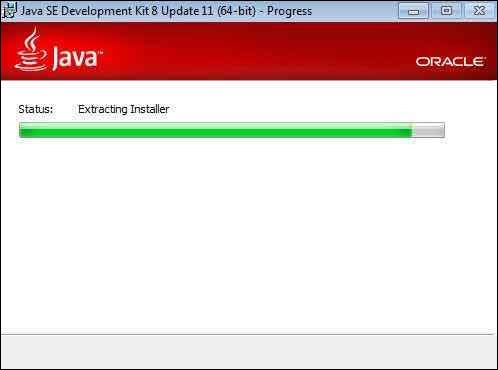
Step 7 − The installer is extracted and its development is proven within the wizard.
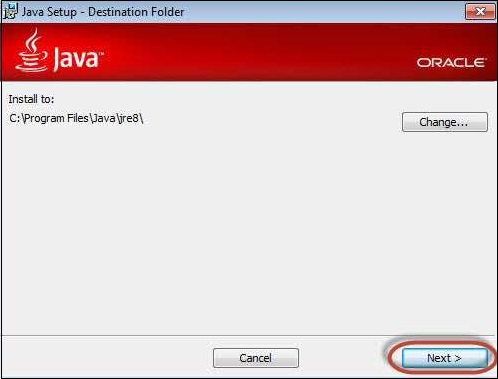
Step 8 − The person can pick the installation location and click on 'Next'.
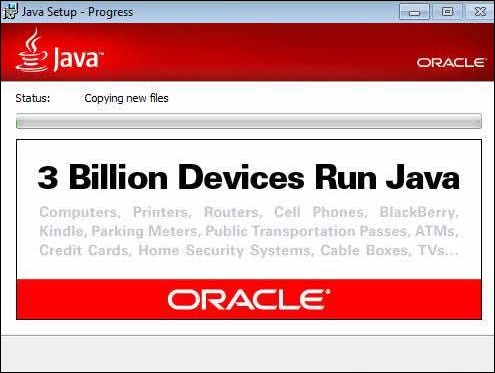
Step 9− The installer installs the JDK and new documents are copied throughout.
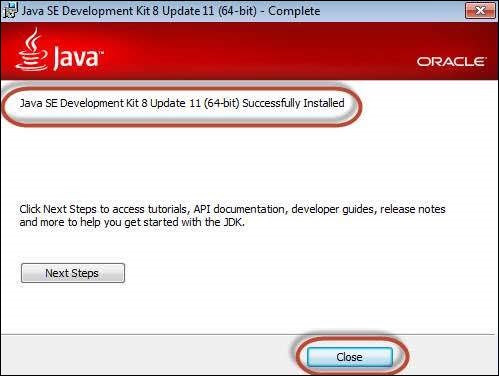
Step 10 − The Installer installs correctly and shows the same to the consumer.
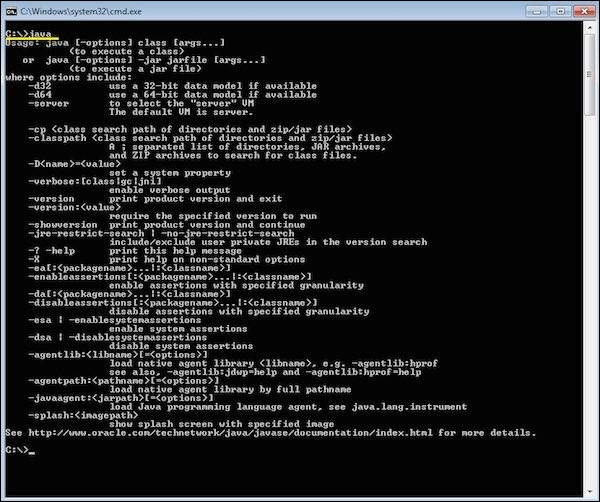
 Step 11 − To confirm if the installation became successful, visit the command activate and just type 'java' as a command. The output of the command is proven beneath. If the Java installation is unsuccessful or if it had NOT been installed, it might throw an "unknown command" blunders.
Download and Configure Eclipse
Step 1 − Navigate to the URL: https://www.Eclipse.Org/downloads/ and download the precise file primarily based on your OS structure.
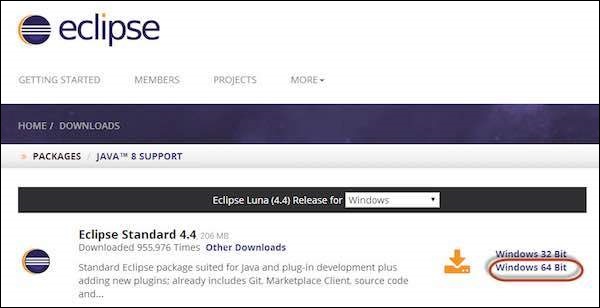
Step 2 − Click the 'Download' button.
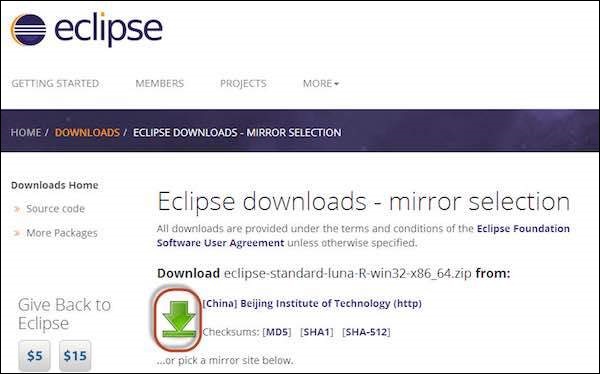
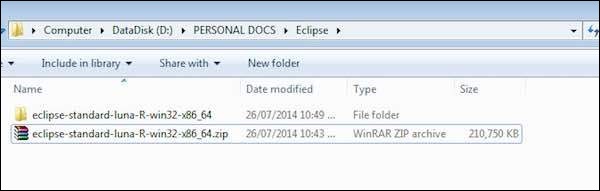
Step 3− The download would be in a Zipped layout. Unzip the contents.
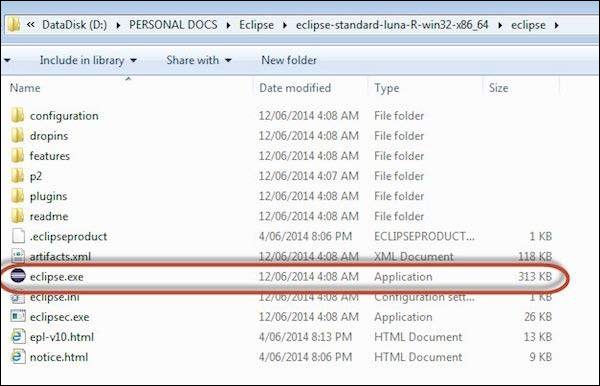
Step 4 − Locate Eclipse.Exe and double click on at the document.
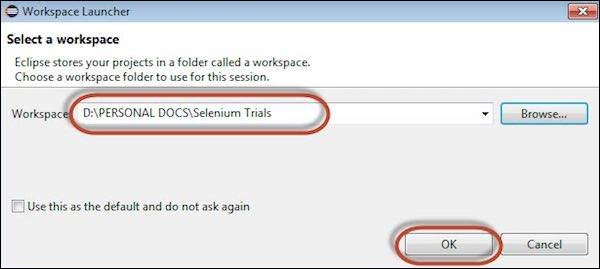
Step 5− To configure the workspace, select the location where the improvement has to take place.
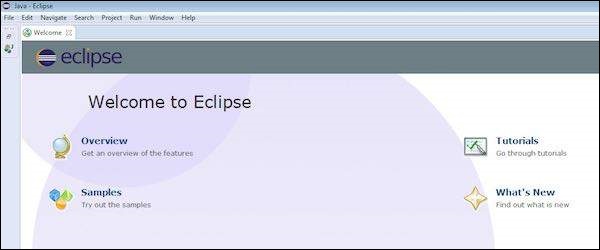
Step 6 − The Eclipse window opens as shown below.
Configure FireBug and FirePath
To paintings with Selenium RC or WebDriver, we need to locate factors primarily based on their XPath or ID or call, and so forth. In order to locate an detail, we want tools/plugins.
Step 1 − Navigate to the URL : https://addons.Mozilla.Org/en-US/firefox/addon/firebug/ and download plugin.
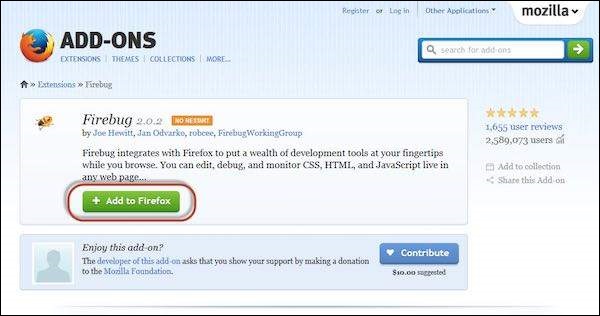
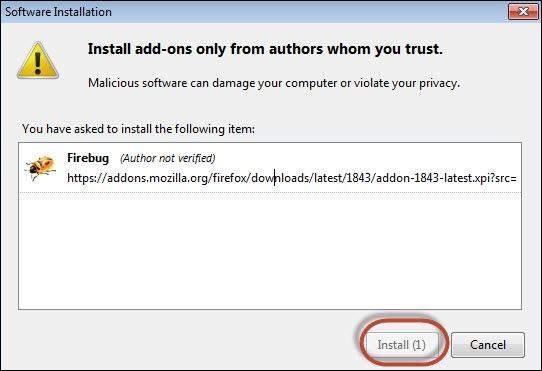
Step 2 − The upload-on installer is proven to the consumer and it's miles established upon clicking the 'Install' button.
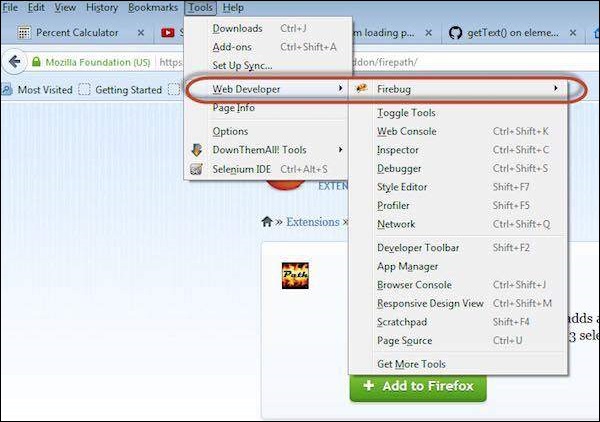
Step 3− After installing, we are able to launch the plugin through navigating to "Web Developer" >> "Firebug".
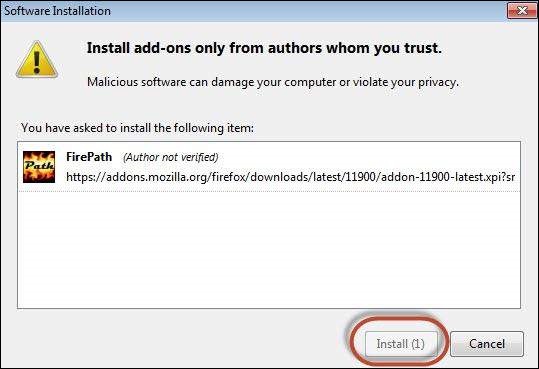
Step 4− FirePath, a plugin that works inside Firebug, allows customers to grab the 'XPath' of an element. Install FirePath by means of navigating to "https://addons.Mozilla.Org/en-US/firefox/addon/firepath/"
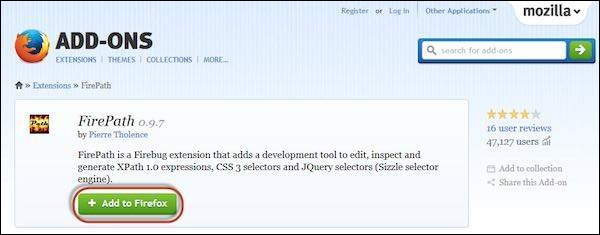
Step 5− The upload-on installer is proven to the consumer and it's far hooked up upon clicking the 'Install' button.
Step 6 − Now release "Firebug" by using navigating to "Tools" >> "Webdeveloper" >> "Firebug".

Example
Now let us recognize the way to use FireBug and FirePath with an instance. For demonstration, we will use www.Google.Com and seize the residences of the text container of "google.Com".
Step 1 − First click on the arrow icon as highlighted inside the following screenshot and drag it to the item for which we would really like to seize the homes. The HTML/DOM of the object could be displayed as shown below. We are able to capture the 'ID' of the input text container with which we will interact.
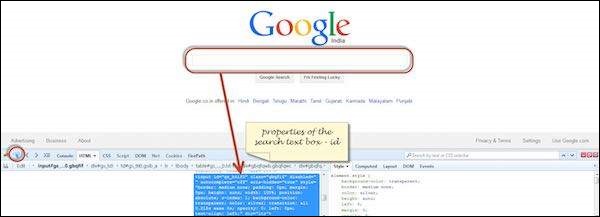
Step 2 − To fetch the XPath of the item, visit 'firepath' tab and carry out the subsequent steps.
- Click the Spy icon.
- Select the Control for which we would really like to capture the XPath.
- XPath of the selected manipulate might be generated.
(1).jpg)
Configure Selenium RC
Now allow us to take a look at how to configure Selenium Remote manipulate. We will recognize a way to develop scripts with Selenium RC in later chapters, but for now, we can apprehend just the configuration a part of it.
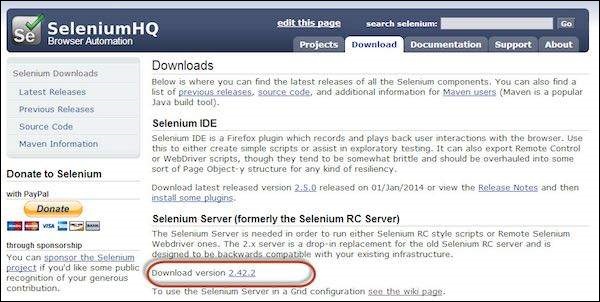
Step 1 − Navigate to the Selenium downloads segment http://www.Seleniumhq.Org/download/ and download Selenium Server by way of clicking on its version number as shown underneath.
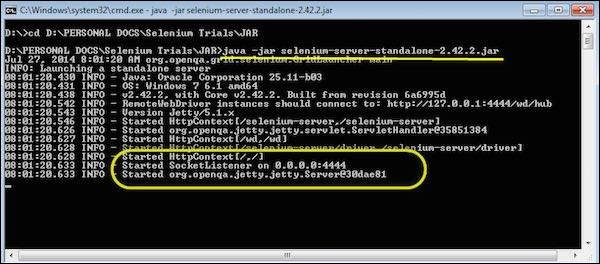
Step 2 − After downloading, we want to start the Selenium Server. To do so, open command activate and navigate to the folder in which the downloaded JAR report is saved as shown beneath.
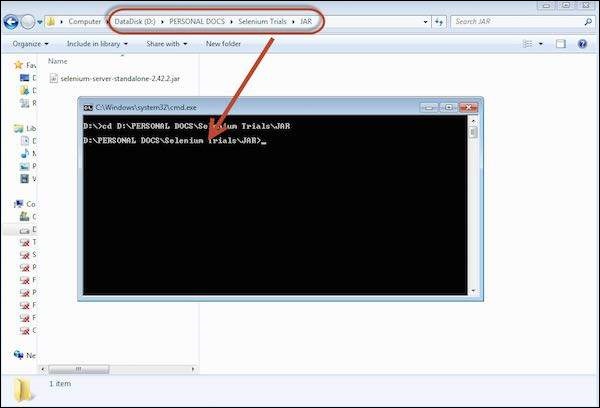
Step 3− To begin the server, use the command 'java -jar <<downloaded jar name >> and if java JDK is established properly, you would get a success message as shown beneath. Now we are able to begin writing Selenium RC scripts.
Configure Selenium WebDriver
Now let us have a look at a way to configure Selenium WebDriver. We will apprehend the way to develop scripts with Selenium WebDriver in later chapters, however for now, we are able to recognize just the configuration part of it.
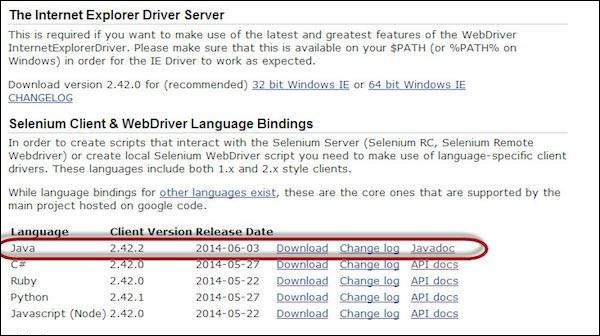
Step 1 − Navigate to the selenium downloads section http://www.Seleniumhq.Org/download/ and down load Selenium WebDriver by means of clicking on its model quantity as shown underneath.
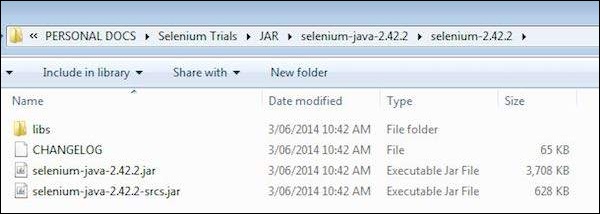
Step 2 − The downloaded record is in Zipped layout and one has to unzip the contents to map it to the mission folder.
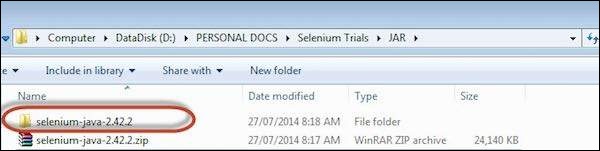 Step 3− The Unzipped contents would be displayed as proven beneath. How to map it to the project folder and how to start scripting might be dealt in the webDriver bankruptcy.A