

After the making of the undertaking, the client ought to order Categories. Classes permit separating the issues into various zones, for example, 'UI', 'backend', 'database', 'administrations', and so forth. It depends on the sort of issues, highlight regions of the product, or the mastery of different advancement groups.
The client can make classes explicit to an extend or characterize it all inclusive over all ventures. Mantis bolsters a pre-characterized worldwide class called 'General'. This is utilized as the default classification while moving issues among activities, and there is no source class in the objective undertaking.
Create a Category
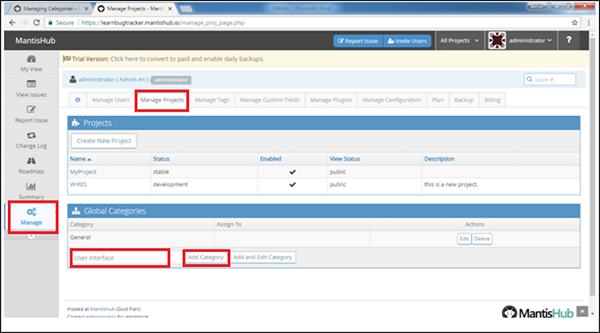
Stage 1 − Go to Manage → Manage Projects tab.
Stage 2 − Enter the Category name in the content box and snap Add Category.
The accompanying screen capture tells the best way to include a Global Category.
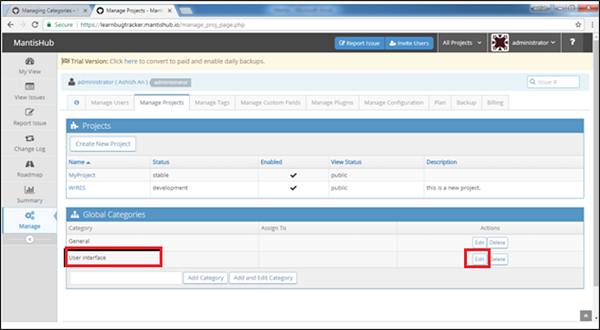
On effective expansion, the client will have the option to see the class name under Global Categories area. The client can alter the class whenever by tapping the Edit button present under Actions segment.
The accompanying screen capture shows included class and Edit button.
Configure Categories
Classifications can be arranged to a default chosen one.
All issues logged under this classification will naturally be allocated to a colleague.
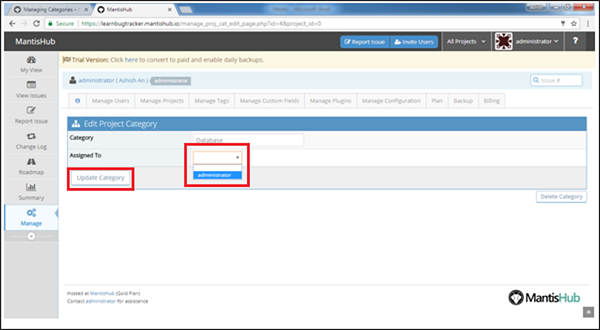
Stage 1 − To design the class, go to Manage → Manage Projects → Global Categories
Stage 2 − Click Edit to design a particular class as appeared in the past screen capture.
Stage 3 − In the Edit Project Category, select Assigned to from the dropdown list.
Stage 4 − Click Update Category.
Here, the client can alter the class name too.
The accompanying screen capture tells the best way to design a class.
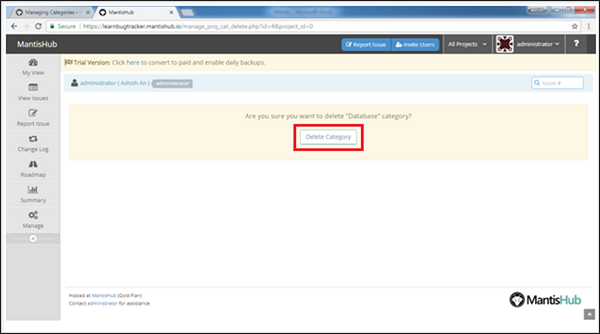
Delete a Category
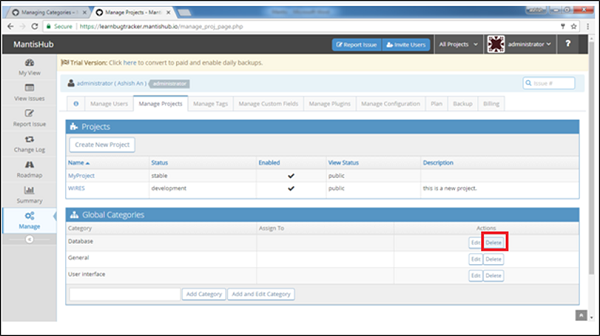
Stage 1 − To erase a classification, go to Manage → Manage Projects.
Stage 2 − Click a particular classification to erase. At that point, click the Delete button from the Actions section as appeared in the accompanying screen capture.
Stage 3 − After clicking Delete, Mantis shows an admonition message and requests affirmation, regardless of whether the client needs to erase a particular classification or not. Snap the Delete Category button as appeared in the accompanying screen capture.
On the off chance that the issues are recorded under the erased class, after cancellation, the issues will be refreshed naturally and shown as no classification.
The client can physically channel the issues and update the classifications for those.a


