

How to Create Android App With Android Studio
Getting Started — Your First Android App
Now, we’ll begin with our first application.
Step 1: Download and Install Android Studio
- First of all, make sure you have Android Studio installed and ready in your Computer.
- If you do not have Android Studio, you can follow these Steps to Install Android Studio.
- Once you are ready with Android Studio, you can proceed with the steps.
Step 2: Create a New Project
- Go to File > New > New Project. After this, the following should be open on your desktop:
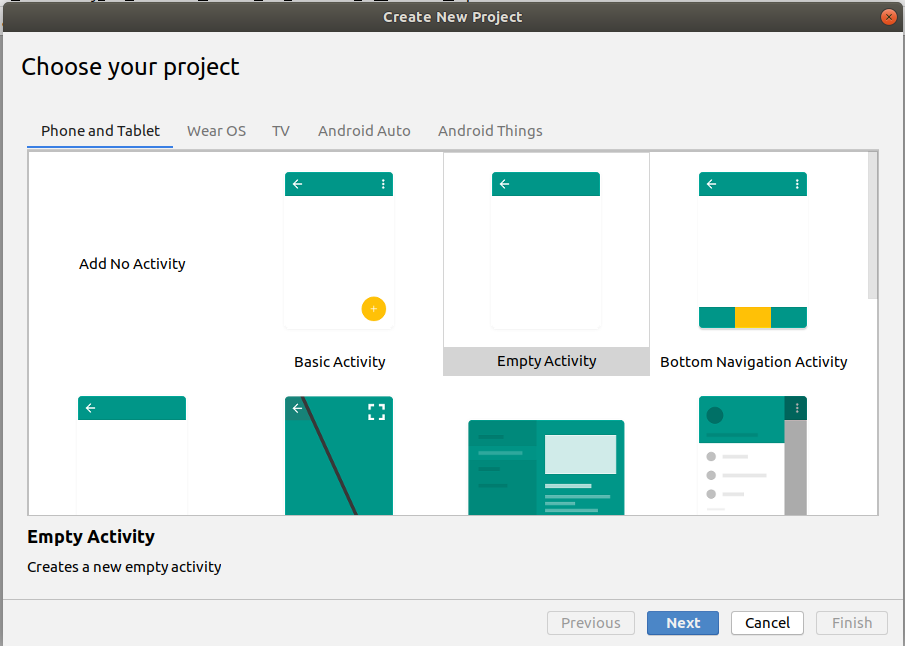
- Here, we’ll select Empty Activity and proceed further by clicking on Next.
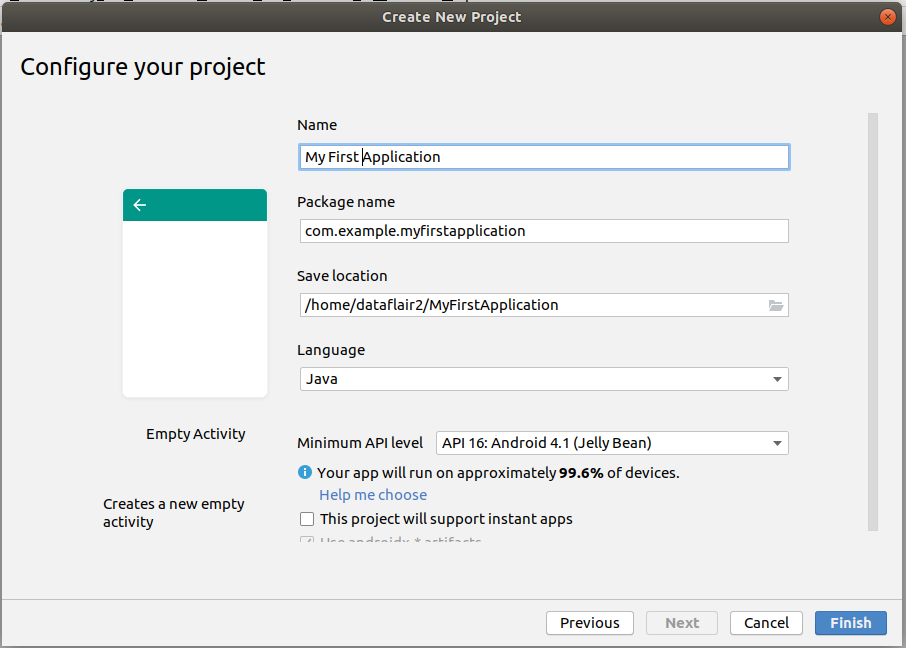
- Now, we’ll name our application and choose the language we prefer. Then, press Finish.
Step 3
At this point, we should have a screen in front of us that looks something like this:
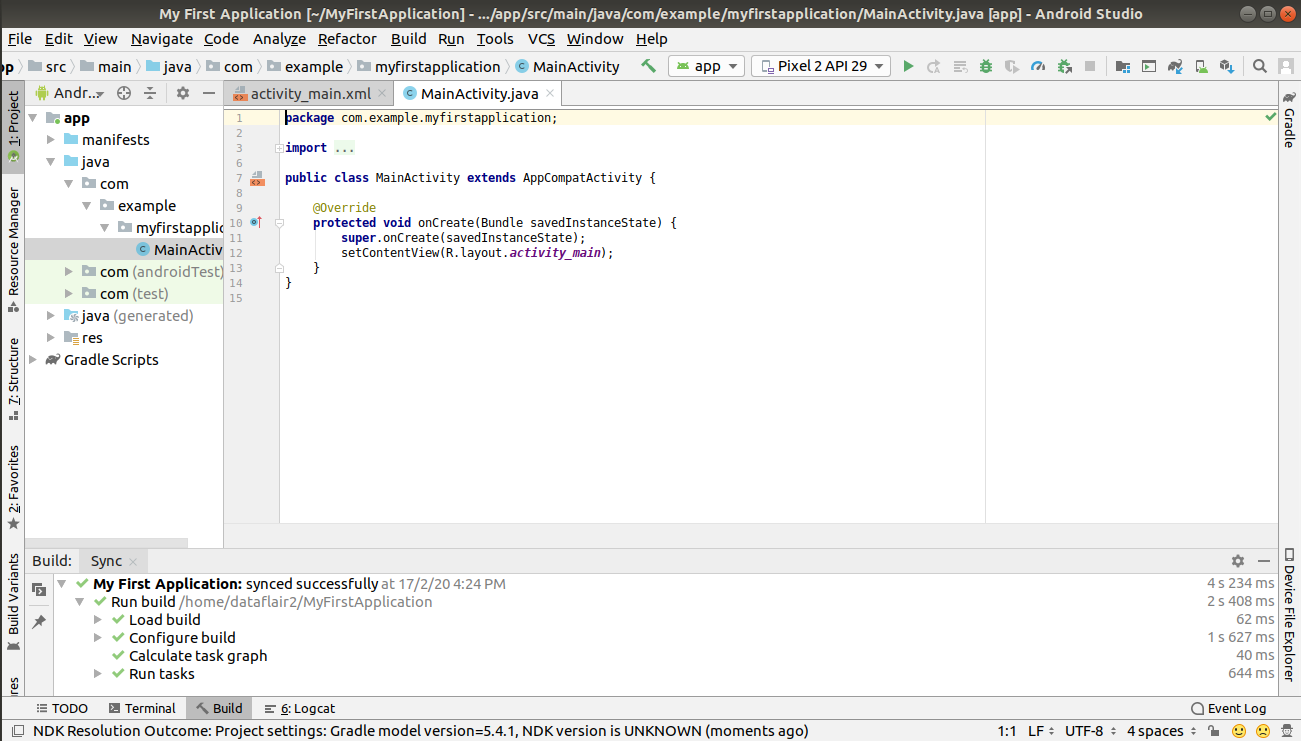
There two areas where we’re going to write the code for our application. The two sections are MainActivity.java and activity_main.xml. Both files come together to make our application function.
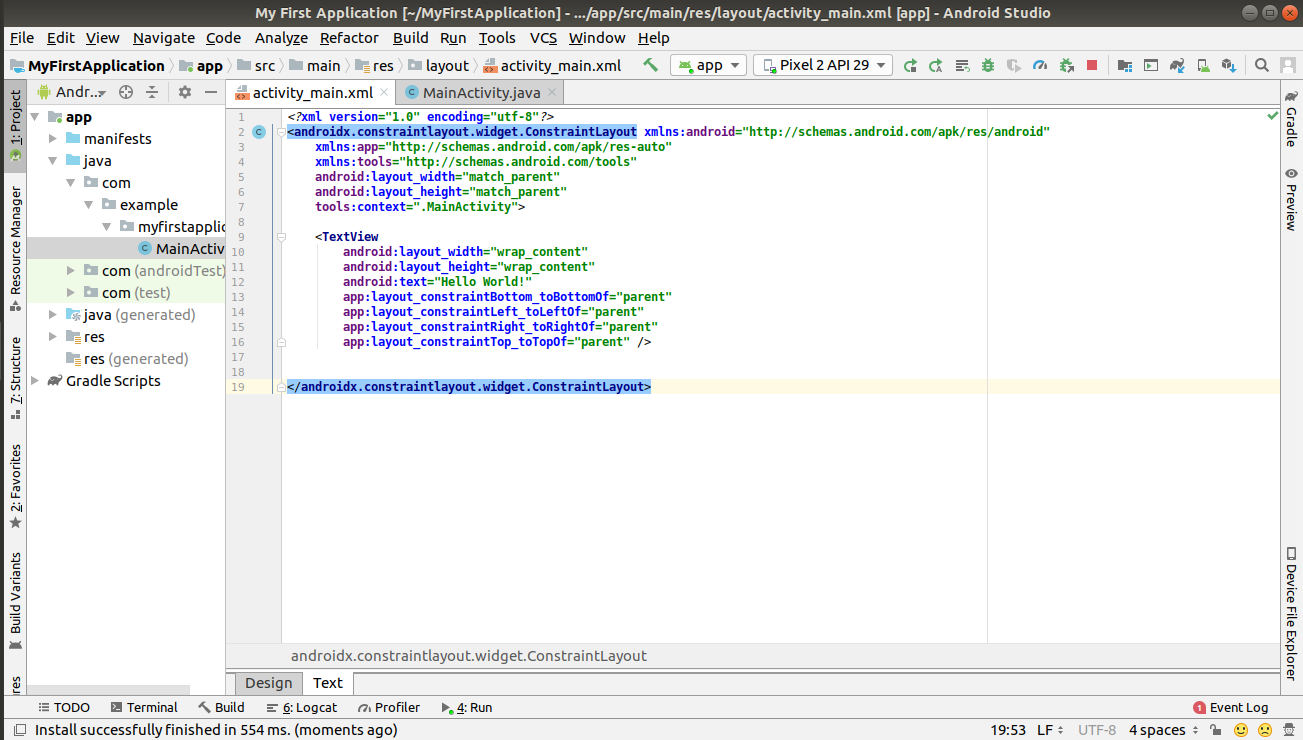
Step 4: Configuring activity_main.xm
Initially, we’ll have the following code in the layout file:
We can change the message that is written in the line: android:text= “Hello World”. We’ll change it to “Hello World, I’m here to take you to the URL to enter”.
We’ll also add a Button and an EditText component where users can enter a URL. To add this, we’ll add the following code in the activity_main.xml file:
<androidx.constraintlayout.widget.ConstraintLayout xmlns:android="http://schemas.android.com/apk/res/android"
xmlns:app="http://schemas.android.com/apk/res-auto"
xmlns:tools="http://schemas.android.com/tools"
android:layout_width="match_parent"
android:layout_height="match_parent"
tools:context=".MainActivity">
<TextView
  android:id="@+id/textView2"
  android:layout_width="wrap_content"
  android:layout_height="wrap_content"
  android:layout_centerHorizontal="true"
  android:layout_marginTop="171dp"
  android:layout_marginBottom="121dp"
  android:fontFamily="@font/alegreya_sc_bold"
  android:text="Hello World, Let us go to the URL"
  android:textColor="@color/colorPrimaryDark"
  android:textSize="20dp"
  app:layout_constraintBottom_toTopOf="@+id/url"
  app:layout_constraintEnd_toEndOf="parent"
  app:layout_constraintStart_toStartOf="parent"
  app:layout_constraintTop_toTopOf="parent" ></TextView>
<EditText
  android:id="@+id/url"
  android:layout_width="wrap_content"
  android:layout_height="wrap_content"
  android:layout_alignParentTop="true"
  android:layout_centerHorizontal="true"
  android:layout_marginStart="99dp"
  android:layout_marginLeft="99dp"
  android:layout_marginTop="121dp"
  android:layout_marginEnd="99dp"
  android:layout_marginRight="99dp"
  android:layout_marginBottom="96dp"
  android:ems="10"
  android:hint="Enter the URL"
  app:layout_constraintBottom_toTopOf="@+id/take_me"
  app:layout_constraintEnd_toEndOf="parent"
  app:layout_constraintStart_toStartOf="parent"
  app:layout_constraintTop_toBottomOf="@+id/textView2" ></EditText>
<Button
  android:id="@+id/take_me"
  android:layout_width="wrap_content"
  android:layout_height="wrap_content"
  android:layout_below="@+id/url"
  android:layout_centerHorizontal="true"
  android:layout_marginStart="122dp"
  android:layout_marginLeft="122dp"
  android:layout_marginTop="56dp"
  android:layout_marginEnd="123dp"
  android:layout_marginRight="123dp"
  android:layout_marginBottom="199dp"
  android:text="Take me there"
  app:layout_constraintBottom_toBottomOf="parent"
  app:layout_constraintEnd_toEndOf="parent"
  app:layout_constraintStart_toStartOf="parent"
  app:layout_constraintTop_toBottomOf="@+id/url" ></Button></androidx.constraintlayout.widget.ConstraintLayout>
Step 5
Now, we’ll write the following code to implement the onClick() action of the button in the MainActivity.java file. The application that we are developing will take us to the respective URL.
package com.DataFlair.dataflair_intent;
import android.content.Intent;
import android.net.Uri;
import androidx.appcompat.app.AppCompatActivity;
import android.os.Bundle;
import android.view.View;
import android.widget.Button;
import android.widget.EditText;
public class MainActivity extends AppCompatActivity {
@Override
protected void onCreate(Bundle savedInstanceState) {
super.onCreate(savedInstanceState);
setContentView(R.layout.activity_main);
final EditText editText = (EditText)findViewById(R.id.urlText);
Button btn = (Button) findViewById(R.id.browse);
btn.setOnClickListener(new View.OnClickListener() {
// overriding the onClickListener to write the action to be performed.
@Override
public void onClick(View v) {
String url = editText.getText().toString();
Intent intent = new Intent(Intent.ACTION_VIEW, Uri.parse(url));
startActivity(intent);
    }
  });
 }
}
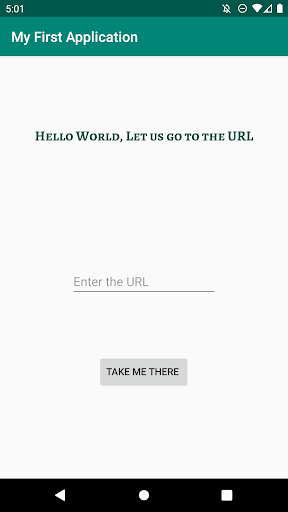
Step 6
After writing the code in both XML and Java files, we will now run the application.
The following should be generated:
Conclusion
Yes, making an Android application in Android Studio is this easy! You just need to have Android Studio installed. The next step would be to create a new project and name it. The rest of the steps are explained in the article. Now, it’s your turn to implement it and learn how interesting it is to create an application.


