

The way toward including custom fields incorporate first characterizing the custom field and afterward connecting it to fitting activities.
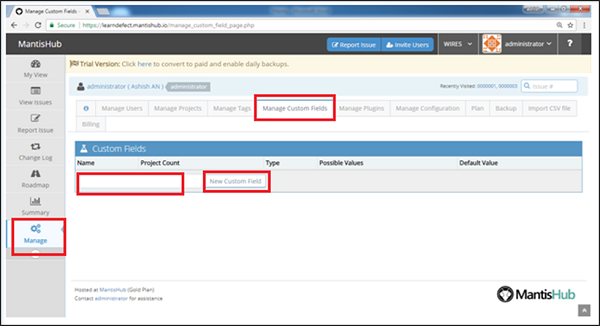
Stage 1 − Go to Manage → Manage Custom Field segment.
Stage 2 − Enter the field name in the textbox.
Stage 3 − Click the New Custom Field button as appeared in the accompanying screen capture.
Stage 4 − After tapping the New Custom Field, the Edit Custom field page opens where the client needs to characterize the custom field detail.
Stage 5 − Select a 'Type' for the field from the dropdown list (date, string, list, and so forth.).
For custom field types, you can compose Possible Values. Utilize the '|' character to isolate the various qualities. Custom field types that expect such records include: count, checkbox, list, multi-determination rundown, and radio catches.
The 'Default Value' definition permits the custom field to have a default esteem dependent on the field type. By and large, it is a basic worth, for example, a string, a number, or an incentive from the rundown of potential qualities. Be that as it may, for the Date type, the potential qualities can incorporate qualities, for example, {today}, {tomorrow}, {+3 days}, {-7 days}, {next week}, {15 December 2013}, and so on.
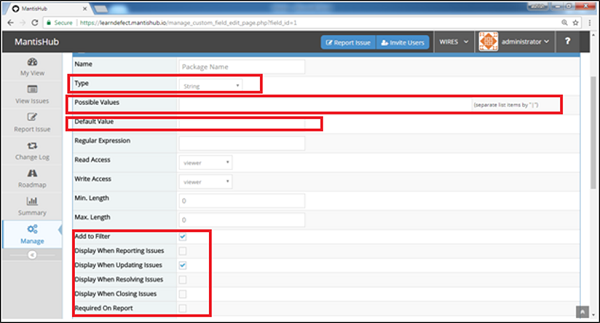
Stage 6 − Check the checkboxes determining the pages on which the custom field ought to show up and is required.
Subsequent to characterizing the custom field, it ought to be connected to the suitable tasks.
Stage 7 − Scroll to the base of the 'Alter Custom Field' page to the 'Connection custom field to activities' segment. Select the undertakings from the showed rundown and snap 'Connection Custom Field' as appeared in the accompanying screen capture. 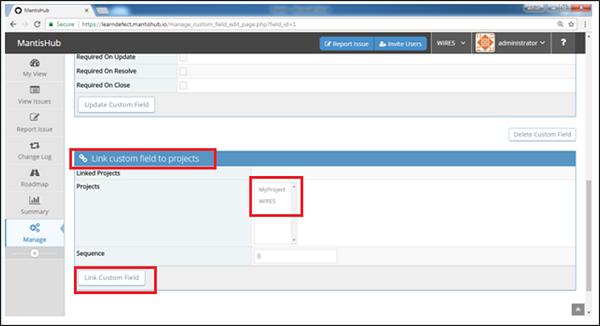 The arrangement number is utilized to decide the general request of custom fields to one another. Littler grouping numbers are demonstrated first.


