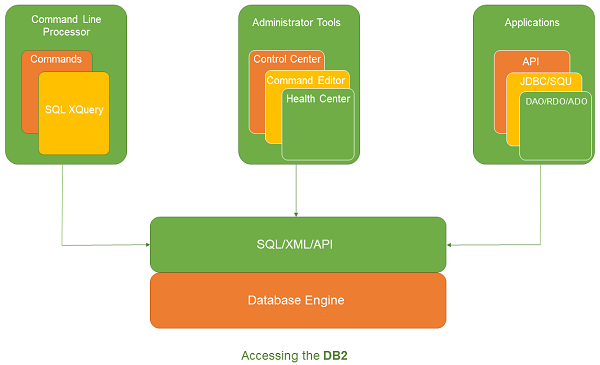
This part depicts establishment steps of DB2 server.
Introduction
You can download the DB2 Server preliminary form or buy the item permit from www.ibm.com. There are two separate DB2 servers accessible for downloading, contingent on the size of working framework, on which it is expected to execute. For instance, on the off chance that you need to download a DB2 server for 32bit Linux or UNIX working framework, at that point you have to download a 32 piece DB2 server. The equivalent applies for 64bit DB2 server.
Hardware requirements
Processor : Minimum Core 2Duo
Slam : 1GB least
Hard circle : 30GB least
Software requirements
Prior to introducing the DB2 server, your framework needs to prepare with the necessary programming on it. For Linux, you have to introduce "libstdc++6.0".
Checking system compatibility
Before introducing DB2 Server, you have to check if your framework is good with the DB2 server. For affirming the similarity, you have to call 'db2prereqcheck' order on order comfort.
Installing DB2 on Linux operating system
Open the Terminal and set the db2 establishment picture organizer way on reassure utilizing "Disc <DB2 establishment folder>" order. At that point type "./db2prereqcheck" order, which affirms the similarity of your framework with DB2 server.
./db2prereqcheck
Figure-1 shows the similarity necessities of Linux working framework and equipment framework.
Follow the given strides for introducing DB2 on your Linux framework:
- Open the terminal.
- Login as root client.
- Open DB2 Installation organizer.
- Type "./db2setup" and press Enter.
This procedure will begin execution of DB2 server arrangement.
Type "./db2setup" and press Enter on root terminal to begin arrangement procedure of DB2 Server.
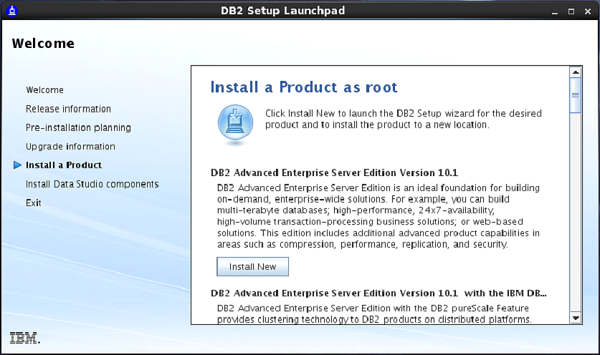
On doing as such, the "Set up Launch Pad" screen shows up. [Figure-2]
On Setup Launch cushion page, select "Introduce a Product" choice from left side menu. Select choice "DB2 Advanced Enterprise Server Edition". Select "Put in New" Button.
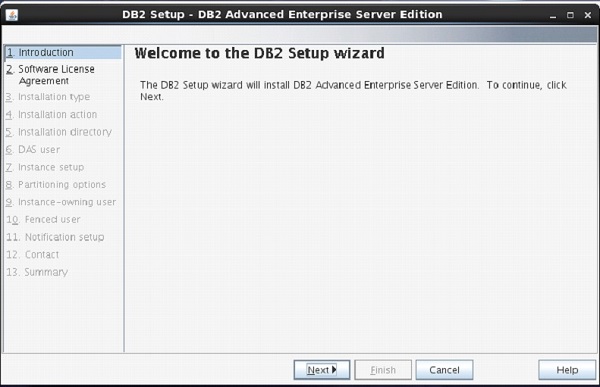
Another edge shows up with name "DB2 arrangement wizard". Snap "Next". [Figure-3]
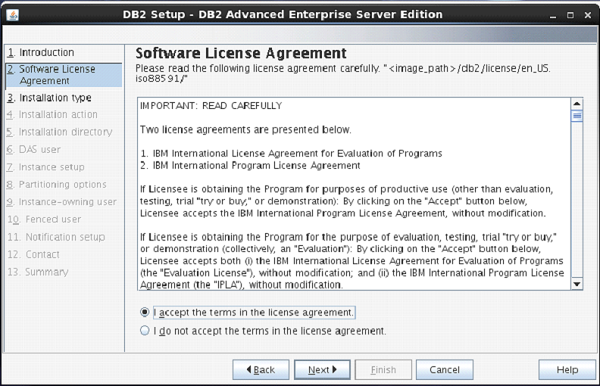
The following screen shows up with DB2 permit understanding. Select "I acknowledge the terms… " Click "Next". [Figure-4]
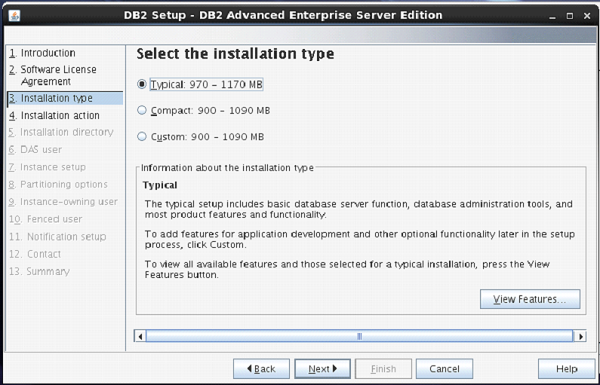
Next screen concocts offer of Installation type, which is set to "Normal" as a matter of course.
Keep a similar determination. Snap "Next". [Figure-5]
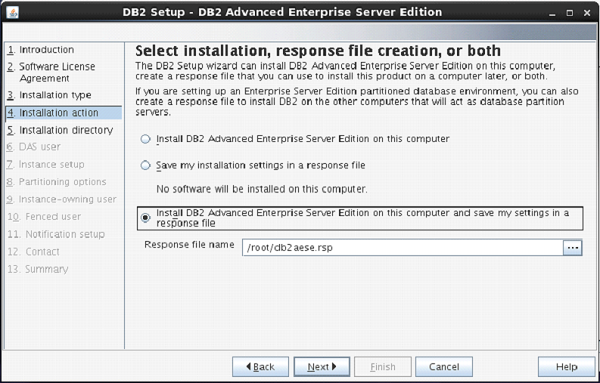
The following screen shows up with establishment activity.
Select "Introduce DB2 Advanced Enterprise Server Edition… "
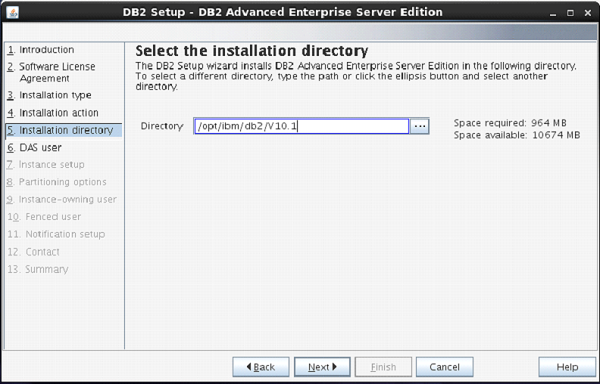
On the following screen, the arrangement program requests determination of establishment index.
Keep the default and snap "Next".
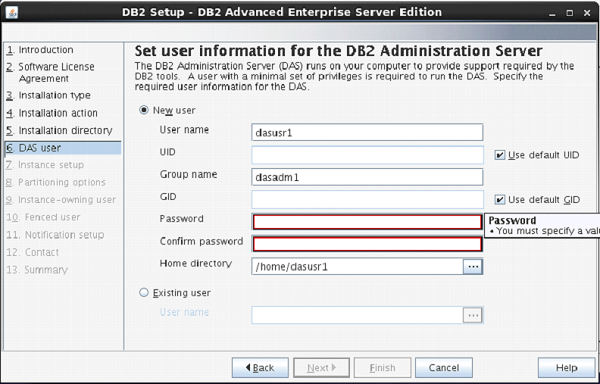
The following screen thinks of the client validation. Enter your secret word for "dasusr1" client.
(Your secret phrase can be indistinguishable from username with the goal that it is advantageous to recall.)
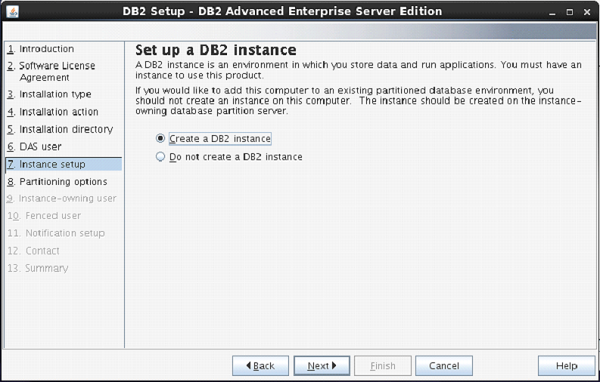
On the accompanying screen, the arrangement approaches you for production of DB2 Server Instance.
Here, it is making a DB2 example with name "db2inst1".
.png)
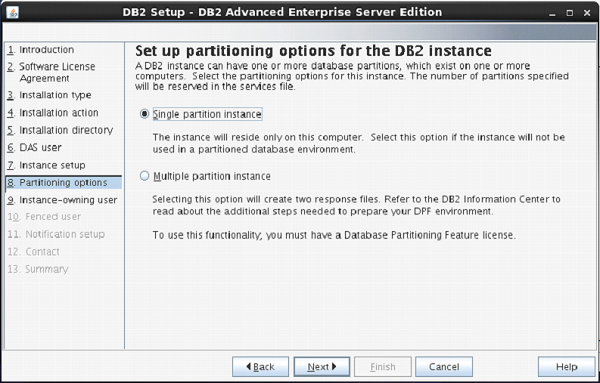
The following screen solicits you the number from segments you require for your default occasion.
You have a decision of "single or Multiple" segments.
Select "single segment occasion". Snap "next".
On the following screen, the arrangement approaches you for validation for DB2 occasion being made.
Here, of course username is made as "db2inst1". You can enter secret phrase same as username.
Snap "Next".
.png)
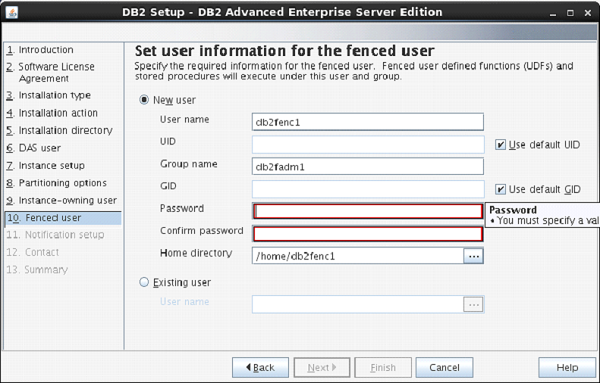
On the following screen, the arrangement approaches to enter confirmation data for "db2fenc" client.
Here, you can enter secret phrase same as username.
Snap "Next".
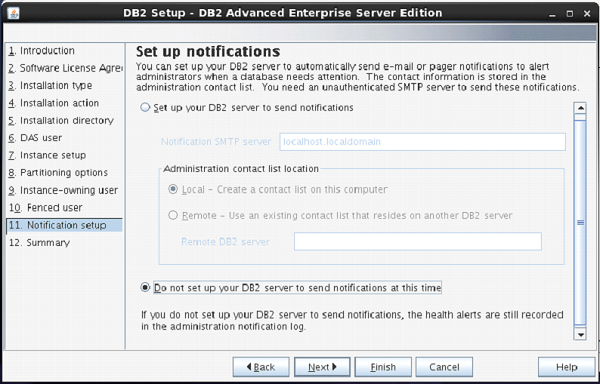
On the following screen, you can choose "Don't arrangement your db2 server to send warnings as of now" alternative.
Snap "Next".
The following screen shows you the data about db2 arrangement.
Snap "Finish".
The DB2 Installation strategy is finished at this stage.
Verifying DB2 installation
You have to confirm the establishment of DB2 server for its handiness. On finishing the DB2 Server establishment, logout from current client mode and login to "db2inst1" client. In "db2inst1" client condition, you can open terminal and execute the accompanying orders to confirm if your db2 item is introduced appropriately or not.
db2level
This order shows the present form and administration level of the introduced DB2 item for current example.
Syntax:
db2level
Example:
db2level
Output:
DB21085I Instance "db2inst2" uses "64" bits
And DB2 code release "SQL10010" with level
identifier "0201010E". Informational tokens
are "DB2 v10.1.0.0", "s120403",
"LINUXAMD64101", and Fix Pack "0".
Product is installed at "/home/db2inst2/sqllib".
db2licm
This order shows all the permit related data of our DB2 Product.
Syntax:
db2licm <parameter>
Example:
db2licm - l
Output:
Product name:                     "DB2 Advanced Enterprise Server Edition"
License type:                     "Trial"
Expiry date:                      "10/02/2021"
Product identifier:               "db2aese"
Version information:              "10.1"
Product name:                     "DB2 Connect Server"
License type:                     "Trial"
Expiry date:                      "10/02/2021"
Product identifier:               "db2consv"
Version information:              "10.1"
Command Line Processor (CLP)
The CLP can be begun in one of the three modes:
Order mode: In this mode, each order and SQL articulation must be prefixed by "db2". For instance, question "db2 initiate database test".
Intuitive information mode: you can dispatch this mode by utilizing the "db2" order. Here, you can pass SQL proclamations without prefix. For instance, "initiate database test".
Clump mode: Here, you have to make a content document, which contains all SQL questions of necessities and spare the record with ".db2" expansion. You can call this in order line utilizing linguistic structure "db2 – tf <filename.db2>".